Tiling boards are a new way of creating tiled areas in your design. You can have multiple layers of tiles, border tiles, profile tiles etc.
Tiling boards are available in the Kitchen and Bathroom room systems. They work in exactly the same way.
To access the tiling boards:
Bathrooms:


Kitchens:


The options are the same for both Kitchens and Bathrooms:


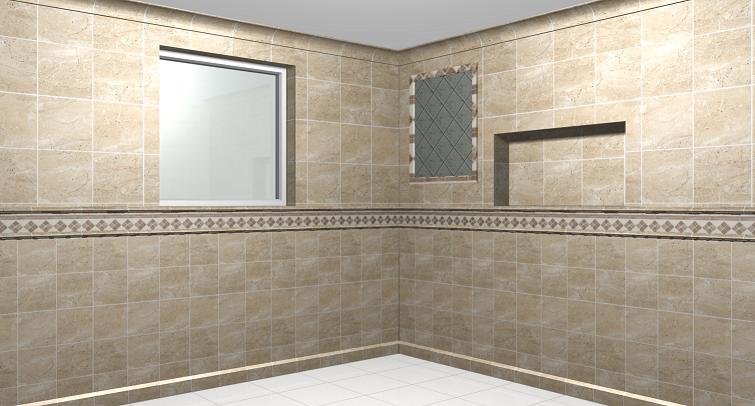
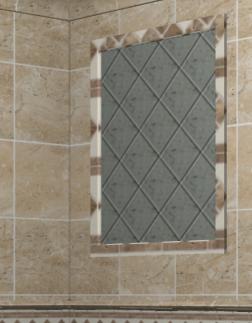
A wall board is a panel of tiling. It is made up of a top and bottom profile, a mid-profile with up to three different types of tile above and below.
In the image above, each wall has three Wall Boards placed against it. On the window wall there is a panel to the left, on top of, and to the right of the window. On the recess wall, there is a panel to the left of the recess, on top of the recess and to the right of it.
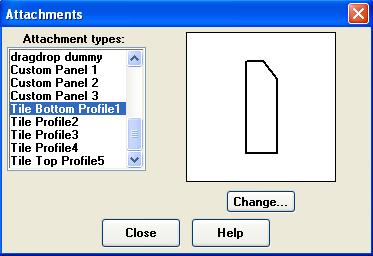
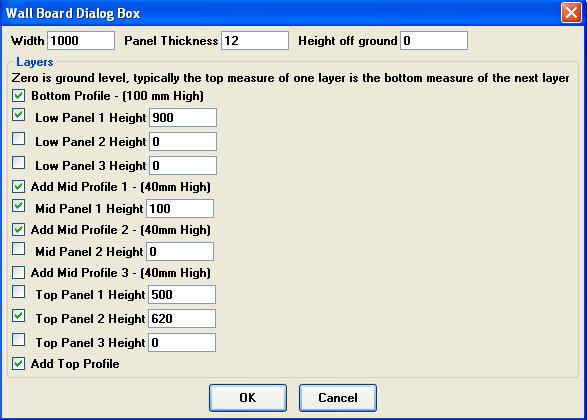
To change the profiles used on the board, click "This Design - Attachments". Select "Tile Top Profile5" to change the top profile, "Tile Bottom Profile1" to change the bottom profile and "Tile Profile 2, 3 or 4" to change the mid-profiles.
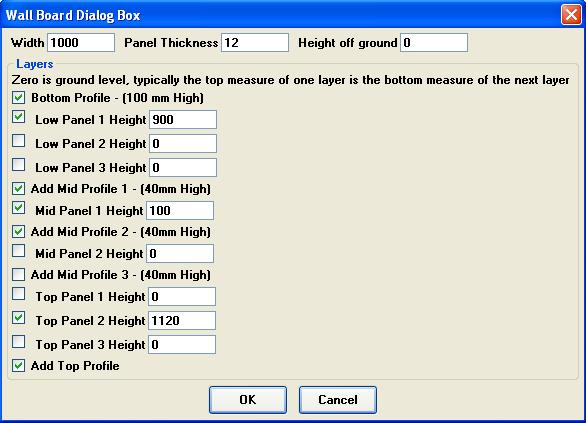
The above properties are from the board to the left of the window. When placing a board over a window, you need to allow a space for the window to be visible.

Note how "Mid-panel2 Height" has been set to 1000 (the height of the window) but the box left un-ticked to leave a space for the window. Also note that the height of "Top panel 2" has been reduced by the height of the window to keep everything in line.
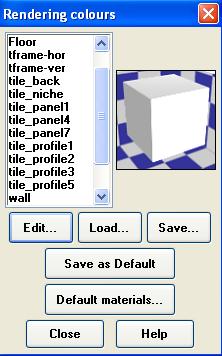
The tiles used by the panel are changed in the normal manner under "This Design - Photo Realism Colours".
A T-Frame places a set of tiles in profiled frame.

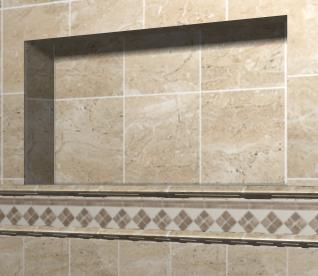
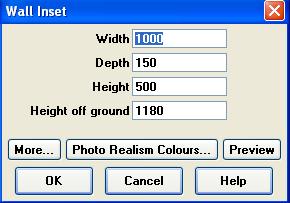
To use the inset, you first need to make a space in the wall the same width as the recess. You can do this while drawing the room, or using the Wall Helper on the Utilities Window. Once you have created the space, drag the inset into position.
You will then need to place a tile board in front of it.
The above image shows the properties of the wall board in front of the inset in the example image. Note that "Top Panel 1" has it's height set to 500 (the same as the height of the inset) but is left un-ticked so it is left as an empty space. Also that the height of "Top Panel 2" has been reduced by the height of the inset.
Return to top.