HOWTO - Have multiple ranges/unit colours in the same design
This HOWTO will explain how to have different ranges in the same design. It also explains how to change the colour of drawerline drawer fronts independantly of the door colour.
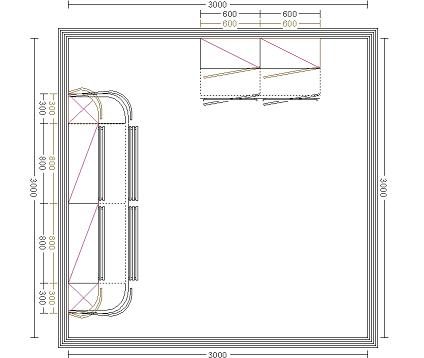
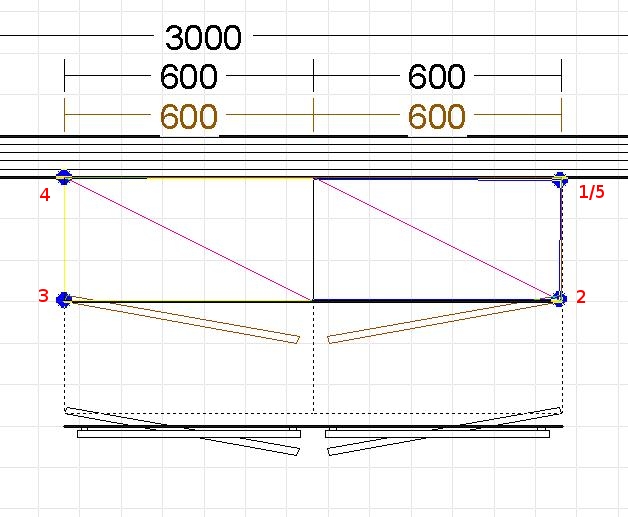
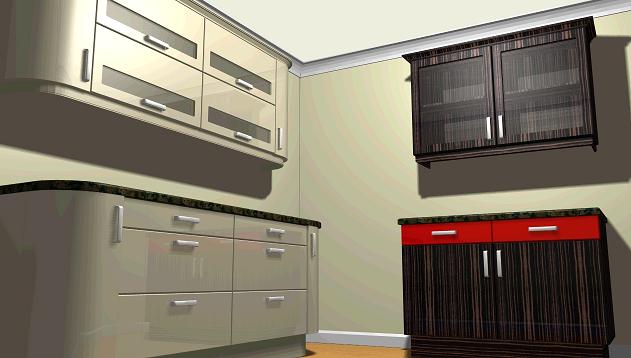
Fig.1 - Example plan.
Cabinet colours.
Select the main colour/range for you design. In this example that will be the units running along the left-hand wall.
To select the range - This Design - Door Type and choose the manufacturer and range as normal.
To specify your own colour - This Design - Photo Realism Colours and change the units colours as normal.
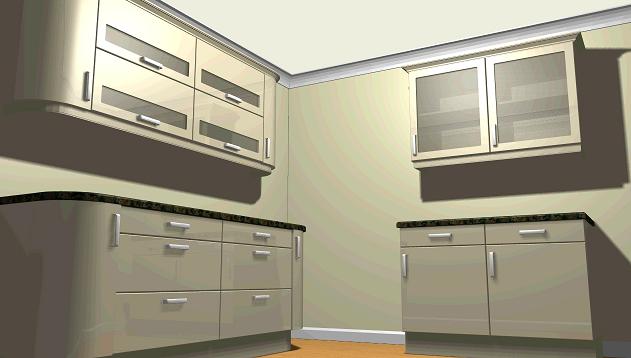
Fig. 2 - Units all the same colour.
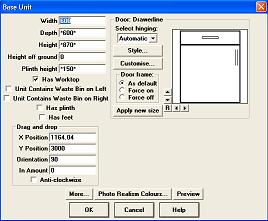
Select and edit the first of the units you want in the alternate range/colour. In this example that will be the units running along the top wall.
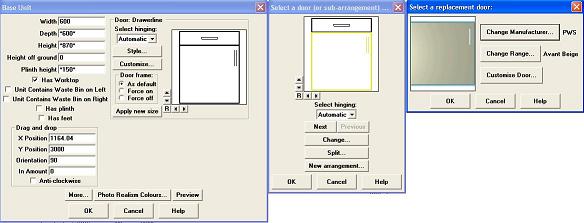
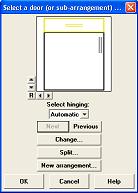
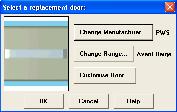
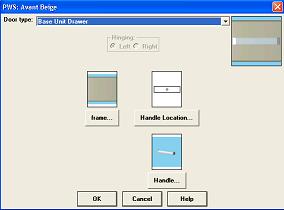
Optional: Change the door shape for this unit. Click Customise then Change then select the required manufacturer and range.
NOTE - you still need to change the door colour.
NOTE - change the door manufacturer and range before changing the colours.
Fig. 3 - Changing the manufacturer and range.
Change the colour for this unit to the alternate colour. Whilst editing the unit click Phot Realism Colours.
Fig. 4 - Change unit colours.

Repeat the above steps for the rest of the units you require in the alternate colour.
Fig. 5 - Door/carcase colour changed.

The Cornice, Pelmet and Plinth have stayed the same colour as the main units.
Remove the cornice, pelmet and plinth from the alternate colour units. Edit the unit, untick the "Has Cornice", "Has Pelmet" and "Has Plinth" options as required.
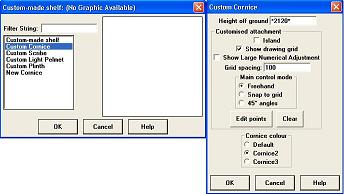
Custom cornice, pelmet, plinth can be found under Wall Units - Shelves - Custom Shelf -


Fig. 6 - Selecting custom cornice.
Drawing a custom cornice is done in the same way as drawing a custom worktop.
Select Cornice2 or Cornice3. click "Edit Points". Draw in clockwise, starting in the back-left corner of the units.
Fig. 7 - Drawing the new cornice.
In this example the first point would be No.1, then 2, 3, 4 then back to the starting point to complete the outline with point 5.
Cut/Curve the cornice same as you would a worktop - F2 to cut back, F4 to curve.
Click "Finish" once you have the correct shape.
To change the colour of your new cornice section, click This design - Photo Realism Colours - you will now have an entry for Cornice2.
Repeat for pelmet and plinth.
Fig. 8 - New cornice colour.
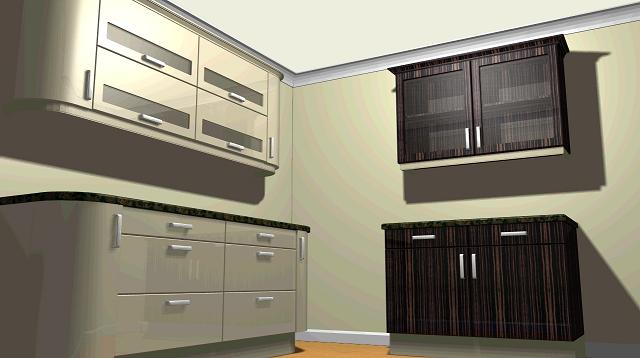
Fig. 9 - New pelmet colour.
Fig. 10 - New plinth colour.
Changing the colour of drawerline drawer fronts.
Fig. 11 - Alternate drawerline colour example.
Edit the unit you wish to have with different coloured drawerline drawer fronts. Click Customise.
Select the drawerline drawer by click Next until it is highlighted in gold. Click Change. Click Customise Door. Click Frame. Select frame option 2.
Fig. 12 - Configuring alternate colour for drawerline
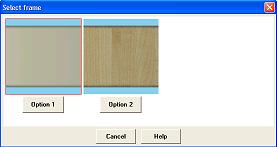
NOTE - not all door ranges have an option for a second drawerline colour. If there is no option 2, or option 2 does not appear in a different colour, you are unable to change the drawerline for this range.
Repeat for each unit you require to have the alternate colour.
To specify the colour for your drawerline drawer fronts click This Design - Photo Realism Colours and change laminate2.

